


The significance of an exhaust manifold gasket cannot be overstated. It acts as a crucial seal between the engine’s cylinder head and the exhaust manifold, ensuring that hot exhaust gases exit the engine smoothly. In this guide, we delve into the realm of Engine Exhaust Manifold gaskets, with a specific focus on the renowned C15 engine. Whether you’re a seasoned mechanic or a DIY enthusiast, understanding these C15 exhaust manifold gaskets is paramount for optimal engine performance.
Understanding the C15 Exhaust Manifold Gasket
When delving into the realm of C15 exhaust manifold gaskets, it is essential to grasp the intricacies of these vital components.
What is an Exhaust Manifold Gasket?
Definition and Function
The exhaust manifold gasket serves as a critical seal between the engine’s cylinder head and the exhaust manifold. It ensures that hot exhaust gases exit the engine smoothly, preventing any leaks that could compromise engine performance.
Importance in Engine Performance
The significance of a robust C15 exhaust manifold gasket cannot be overstated. By maintaining a secure seal, it prevents exhaust gases from escaping prematurely, optimizing engine efficiency and overall performance.
Specifics of the C15 Exhaust Manifold Gasket
Design and Materials
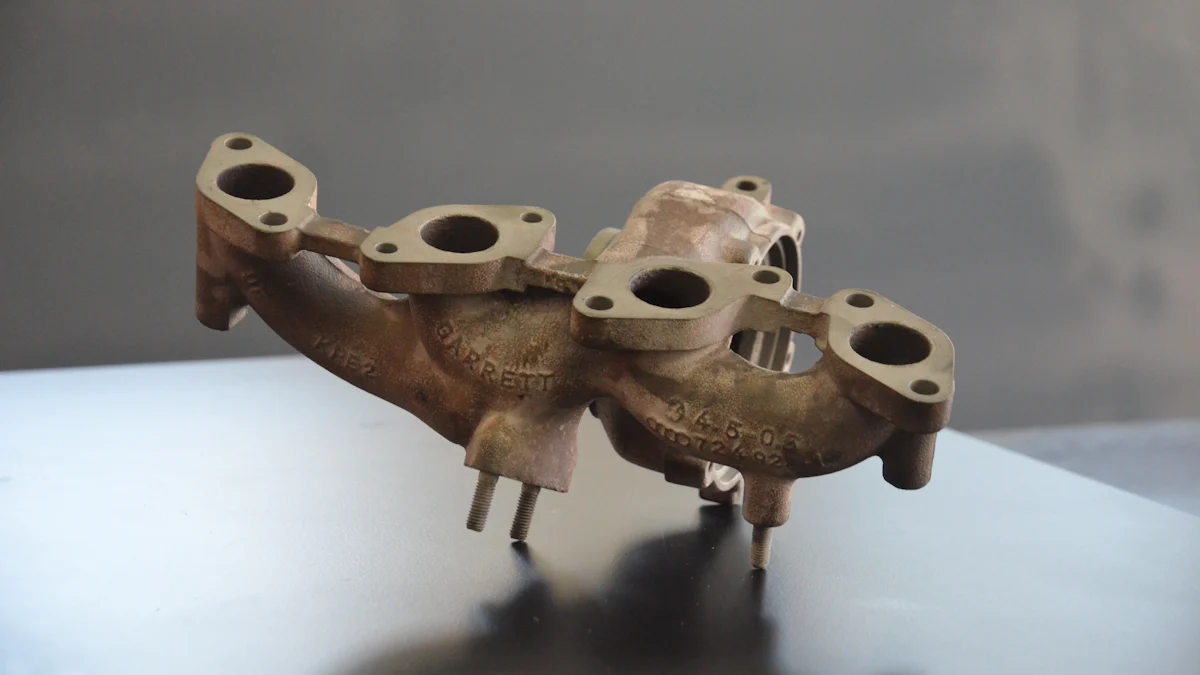
The design of a C15 exhaust manifold gasket is meticulously crafted to withstand high temperatures and pressure fluctuations within the engine. Typically made from durable materials such as metal or graphite, these gaskets are engineered to provide long-lasting performance under demanding conditions.
Compatibility with C15 Engine Models
Ensuring compatibility between the exhaust manifold gasket and specific C15 engine models is crucial for a seamless fit and optimal functionality. Manufacturers design these gaskets to meet the precise specifications of C15 engines, guaranteeing a perfect match for reliable operation.
Signs of a Faulty Gasket
When encountering issues with your vehicle’s C15 exhaust manifold gasket, it is crucial to recognize the telltale signs indicating a potential problem. By identifying these symptoms early on, you can address any issues promptly and prevent further damage to your engine.
Common Symptoms
Hissing or Tapping Noises
Unusual hissing or tapping noises emanating from the engine compartment can be indicative of a faulty C15 exhaust manifold gasket. These sounds often occur when there is a leak in the gasket, allowing hot gases to escape and create audible disturbances. Ignoring these noises may lead to decreased engine efficiency and potential long-term damage.
Poor Fuel Economy
A decline in fuel economy can be a red flag signaling an issue with the exhaust manifold gasket on your C15 engine. When the gasket fails to maintain a tight seal, it can disrupt the proper flow of exhaust gases, resulting in decreased fuel efficiency. Monitoring your vehicle’s fuel consumption and addressing any sudden changes promptly can help prevent further complications.
Burning Smells and Smoke
The presence of burning smells or smoke, especially during engine operation, can indicate a compromised C15 exhaust manifold gasket. When the gasket deteriorates or develops leaks, it can allow heat and exhaust fumes to escape abnormally, leading to unpleasant odors and visible smoke emissions. Addressing this issue promptly is essential to prevent safety hazards and ensure optimal engine performance.
Diagnostic Methods
Visual Inspection
Conducting a thorough visual inspection of your C15 exhaust manifold gasket can provide valuable insights into its condition. Look for signs of wear, damage, or discoloration on the gasket surface that may indicate leaks or deterioration. Additionally, inspect surrounding components for soot deposits or unusual residue that could point towards gasket issues.
Using Diagnostic Tools
Utilizing diagnostic tools such as pressure testers or smoke machines can aid in pinpointing potential faults in the exhaust manifold gasket of your C15 engine. These tools help detect leaks by pressurizing the system or introducing simulated smoke to identify areas where gases are escaping. Seeking professional assistance for advanced diagnostics can ensure accurate assessment and effective resolution.
Tools and Materials Needed
Essential Tools
Installing a new Exhaust Gasket requires specific tools to ensure a seamless replacement process. Here are the essential tools you will need:
Wrenches and Sockets
Begin by preparing a set of high-quality wrenches and sockets. These tools are indispensable for loosening and tightening the nuts and bolts securing the exhaust manifold. Opt for sturdy wrenches that provide a firm grip, allowing you to maneuver effortlessly in tight spaces.
Torque Wrench
A torque wrench is a precision tool that plays a vital role in achieving the correct level of tightness when fastening components. This tool ensures that you apply the appropriate amount of force to secure the exhaust gasket properly. By using a torque wrench, you can prevent under or over-tightening, safeguarding against potential leaks or damage.
Required Materials
In addition to the essential tools, gathering the necessary materials is crucial for a successful Exhaust Gasket replacement. Here are the required materials you should have on hand:
Replacement Gasket Kit
Invest in a high-quality replacement gasket kit specifically designed for your vehicle’s make and model. These kits typically include all the gaskets, seals, and hardware needed for a comprehensive installation. Ensure that the kit matches your C15 engine specifications to guarantee compatibility and optimal performance.
RTV Sealant
RTV sealant, also known as Room-Temperature Vulcanizing sealant, is an indispensable material for creating a secure seal between components. When replacing an Exhaust Gasket, applying RTV sealant at strategic points can enhance the gasket’s effectiveness by filling any gaps or irregularities in the mating surfaces. This silicone-based sealant forms a durable bond upon curing, providing an additional layer of protection against leaks.
By equipping yourself with these essential tools and materials, you can embark on replacing your C15 Exhaust Manifold Gasket confidently. Remember to follow manufacturer guidelines and best practices throughout the replacement process to ensure optimal engine performance and longevity.
Step-by-Step Replacement Guide

Preparation
To initiate the replacement process of the C15 exhaust manifold gasket, meticulous preparation is essential to ensure a smooth transition.
Safety Precautions
Prioritize safety by donning appropriate protective gear, including gloves and eyewear, to shield yourself from potential hazards during the replacement procedure. Safety should always be the foremost consideration when working on automotive components.
Engine Cool Down
Allow the engine to cool down completely before commencing any work on the exhaust manifold gasket. This cooling period prevents accidental burns and ensures a safer environment for handling engine components.
Removal of the Old Gasket
When removing the existing C15 exhaust manifold gasket, precision and care are paramount to prevent damage to surrounding parts.
Disconnecting Components
Begin by disconnecting relevant components attached to the exhaust manifold carefully. Loosen bolts and nuts securing the manifold in place, ensuring each step is executed meticulously to avoid any mishaps.
Removing the Exhaust Manifold
Gently detach the exhaust manifold from its position, taking care not to disturb adjacent elements. A steady hand and attention to detail are crucial during this phase to maintain the integrity of engine components.
Installation of the New Gasket
Installing a fresh exhaust manifold gasket demands accuracy and methodical execution to guarantee optimal performance post-replacement.
Cleaning the Surface
Thoroughly clean the mating surface where the new gasket will be placed. Remove any debris or residue that could compromise the seal, ensuring a pristine environment for secure attachment.
Placing the New Gasket
Position the new C15 exhaust manifold gasket meticulously onto the cleaned surface, aligning it precisely with corresponding bolt holes for a snug fit. Proper alignment is critical for establishing an effective seal and preventing leaks.
Reassembling Components
Carefully reassemble all disconnected components back onto the exhaust manifold, following reverse steps of disassembly. Tighten bolts securely but cautiously, ensuring each part is correctly aligned for seamless integration.
Final Checks
Ensuring No Leaks
- Inspect the newly installed C15 exhaust manifold gasket meticulously to verify a secure seal.
- Check for any signs of irregularities or gaps that could potentially lead to leaks.
- Verify that the gasket is aligned correctly with the cylinder head and exhaust manifold, ensuring a snug fit.
- Apply pressure strategically on different sections of the gasket to confirm uniform compression for optimal sealing.
- Utilize diagnostic tools such as smoke machines to detect any escaping gases that might indicate leakage points.
Testing Engine Performance
- Initiate the engine post-replacement to assess its operational functionality.
- Listen attentively for any unusual noises that could signify improper sealing of the exhaust manifold gasket.
- Monitor the engine’s performance during acceleration and deceleration phases for consistent power delivery.
- Observe the exhaust system for abnormal emissions or odors that might indicate leaks in the gasket seal.
- Conduct a comprehensive test drive to evaluate overall engine responsiveness and fuel efficiency.
Tips for Maintenance and Prevention
Regular Inspections
When it comes to ensuring the longevity and optimal performance of your vehicle’s C15 exhaust manifold gasket, regular inspections play a pivotal role. By conducting routine visual checks and listening for any unusual noises, you can proactively address potential issues before they escalate.
Visual Checks
Initiate your maintenance routine by visually inspecting the C15 exhaust manifold gasket for any signs of wear, damage, or discoloration. Look closely at the gasket surface to identify irregularities that may indicate leaks or deterioration. Additionally, examine surrounding components for soot deposits or residue, which could be indicative of underlying gasket issues.
Listening for Unusual Noises
Incorporate auditory assessments into your inspection process by listening attentively for any abnormal noises emanating from the engine compartment. Unusual hissing or tapping sounds could signify a compromised exhaust manifold gasket on your C15 engine. By being attuned to these auditory cues, you can promptly address potential gasket-related issues and prevent further complications.
Proper Installation Techniques
Ensuring the proper installation of a new Exhaust Gasket is paramount in maintaining a secure seal and optimal engine functionality. By utilizing correct tools and adhering to manufacturer guidelines, you can facilitate a seamless replacement process that enhances overall performance.
Using Correct Tools
Equip yourself with high-quality wrenches, sockets, and a torque wrench to facilitate the replacement of the C15 exhaust manifold gasket effectively. These essential tools enable you to loosen and tighten nuts and bolts securely while ensuring precise torque application for a snug fit. By using the correct tools, you can streamline the installation process and minimize the risk of errors.
Following Manufacturer Guidelines
Prioritize adherence to manufacturer guidelines throughout the replacement procedure to guarantee compatibility and optimal performance. Consult the specific instructions provided by the manufacturer regarding torque specifications, alignment procedures, and recommended sealants. By following these guidelines meticulously, you can achieve a successful installation that promotes long-term durability and reliability.
After installation, start the engine and inspect for any signs of leaks. It’s not uncommon to need a slight retightening of the bolts after the engine reaches its operating temperature.
Recap of the Exhaust Manifold Gasket’s Vital Role:
- The exhaust manifold gasket serves as a crucial seal between the engine’s cylinder head and the exhaust manifold, ensuring optimal engine performance by facilitating the smooth exit of hot exhaust gases.
Summary of the Replacement Process:
- Replacing the C15 exhaust manifold gasket demands meticulous preparation, precise removal of the old gasket, accurate installation of the new one, and thorough final checks to prevent leaks and ensure seamless engine operation.
Encouragement for Regular Maintenance:
- Performing routine visual inspections and listening for unusual noises can help detect potential issues early on, allowing for prompt maintenance to prevent further complications and maintain engine efficiency.
Final Thoughts on Engine Performance Optimization:
- By prioritizing proper installation techniques, following manufacturer guidelines, and conducting post-replacement tests diligently, you can safeguard against leaks, enhance engine responsiveness, and uphold optimal performance levels.
Post time: Jun-17-2024