


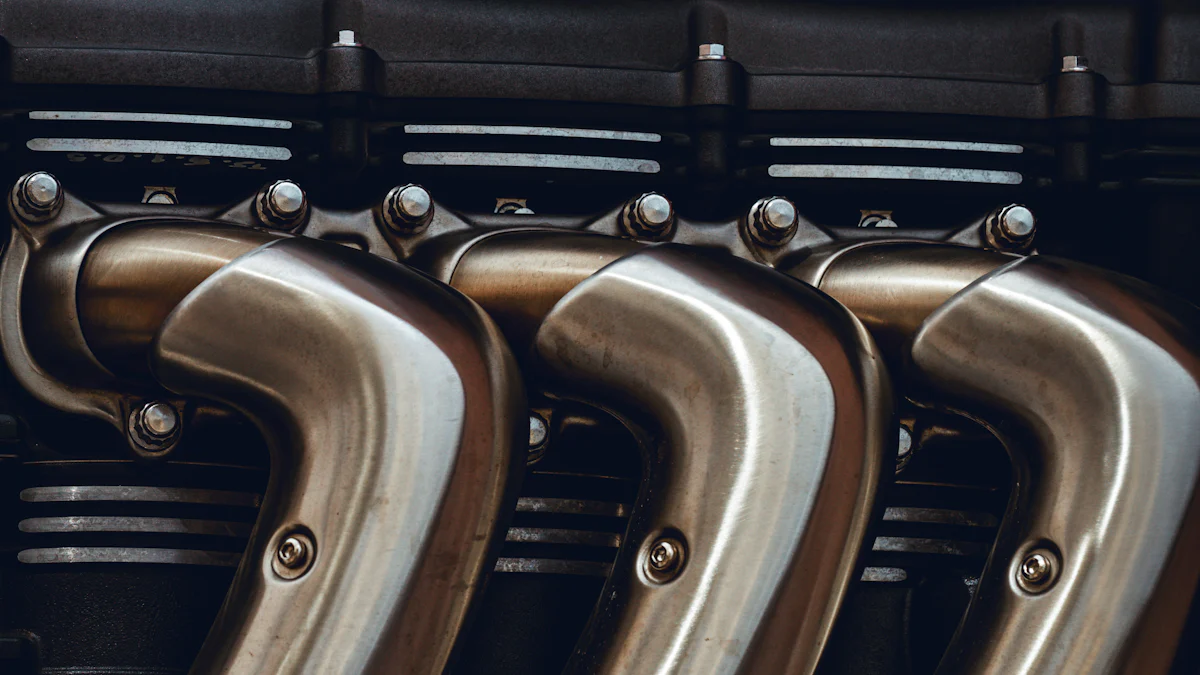
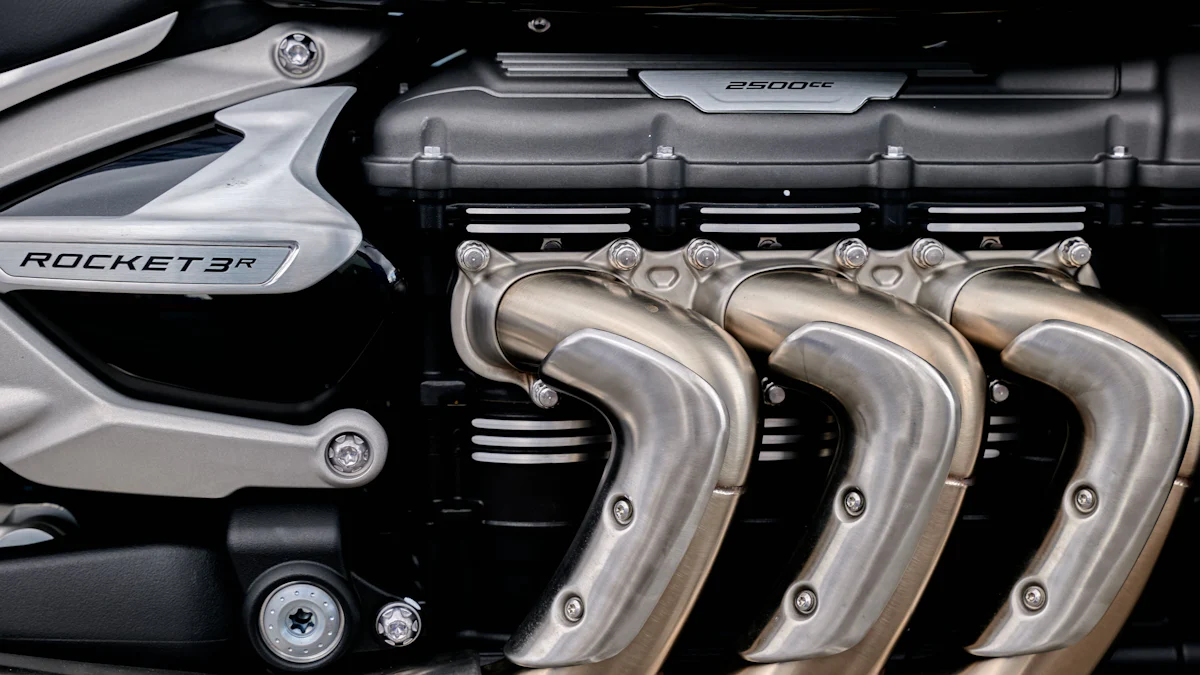
The MGB exhaust manifold is a vital component that significantly influences the engine’s performance. Proper installation of this crucial part is essential to ensure optimal engine function and efficiency. When installed correctly, the exhaust manifold can lead to remarkable improvements in performance, including a significant reduction in reworking rates and material waste. Choosing a high-quality Engine Exhaust Manifold, such as the Lightweight Stainless Steel Exhaust Manifold, can enhance the engine’s overall efficiency by optimizing exhaust flow patterns. Understanding the importance of precise installation is key to unlocking these performance benefits.
Tools and Materials Needed
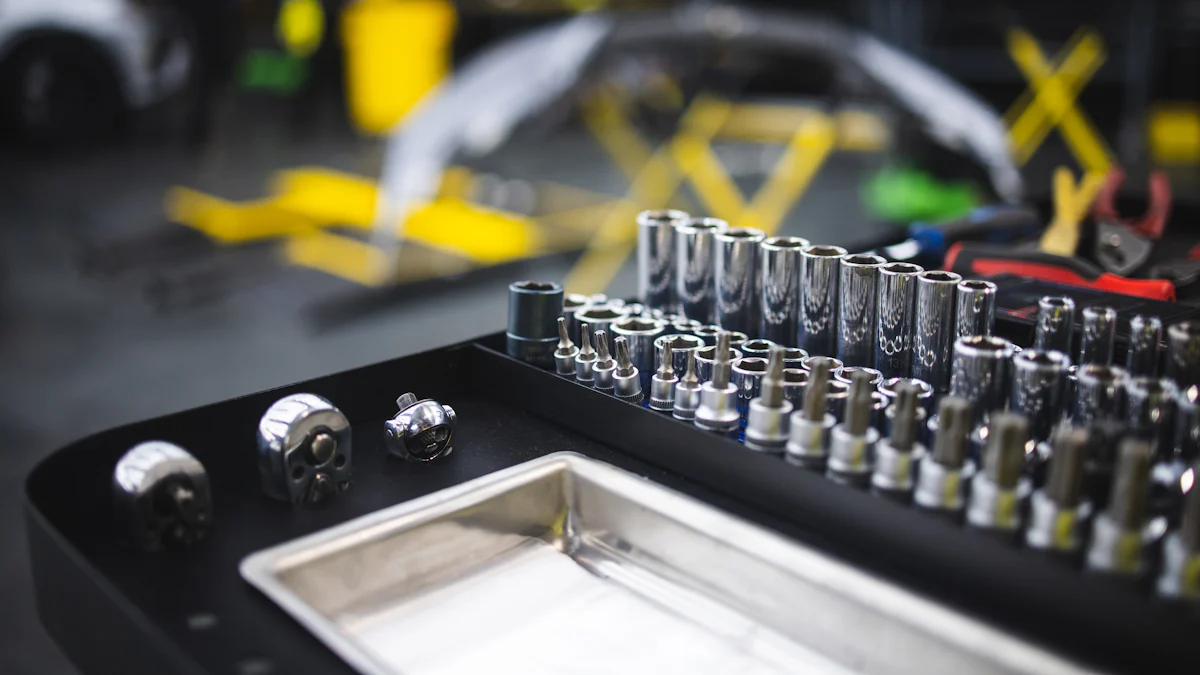
Essential Tools
Wrenches and Sockets
- Use wrenches and sockets to securely fasten bolts and nuts during the installation process.
- Ensure the correct size of wrenches and sockets for a precise fit on the components.
Screwdrivers
- Employ screwdrivers to remove or tighten screws that hold various parts in place.
- Different types of screwdrivers may be required based on the specific components being handled.
Torque Wrench
- Utilize a torque wrench to apply the accurate amount of force when tightening bolts.
- Following manufacturer specifications for torque settings is crucial to prevent under or over-tightening.
Necessary Materials
New Exhaust Manifold
- Acquire a new exhaust manifold to replace the existing one for improved engine performance.
- Verify compatibility with your vehicle’s make and model before proceeding with the installation.
Gaskets and Seals
- Obtain gaskets and seals to create a secure seal between components, preventing exhaust leaks.
- Inspect gaskets for any signs of damage or wear before installation.
Anti-seize Compound
- Apply anti-seize compound on bolt threads to facilitate easier removal in the future.
- Prevent corrosion and seizing of bolts by using this compound during assembly.
Werkwell Harmonic Balancer (optional but recommended)
- Consider adding the Werkwell Harmonic Balancer to reduce engine vibration and enhance smooth operation.
- This optional component can contribute to overall engine efficiency and longevity.
Preparation Steps
Safety Precautions
Disconnecting the Battery
- Start by disconnecting the battery to ensure safety during the installation process.
- Prevent electrical mishaps by detaching the battery cables carefully.
- Eliminate the risk of short circuits by following this crucial safety step.
Ensuring the Engine is Cool
- Verify that the engine has cooled down before proceeding with any work.
- Avoid burns or injuries by allowing sufficient time for the engine to cool.
- Prioritize safety by ensuring a safe working temperature for handling components.
Vehicle Setup
Lifting the Vehicle
- Utilize a reliable jack to lift the vehicle and access the underside effectively.
- Position the jack securely under designated lifting points for stability.
- Elevate the vehicle gradually to avoid sudden movements or instability.
Securing the Vehicle on Jack Stands
- Place sturdy jack stands under reinforced sections of the vehicle frame.
- Lower the vehicle onto the jack stands carefully for additional support.
- Confirm that the vehicle is stable and secure before initiating any installation tasks.
Removal of the Old Exhaust Manifold
Accessing the Manifold
Removing Engine Covers
To access the Engine Exhaust Manifold, start by removing the engine covers. This step allows for a clear view of the manifold and facilitates its removal without any obstructions. Carefully detach the engine covers to reveal the manifold underneath.
Detaching Heat Shields
Next, proceed to detach the heat shields surrounding the Engine Exhaust Manifold. These shields serve to protect nearby components from excessive heat generated by the manifold. By removing them, you create space to work on the manifold directly and ensure a smooth removal process.
Disconnecting Components
Removing Exhaust Pipes
As part of removing the old Engine Exhaust Manifold, focus on disconnecting the exhaust pipes attached to it. These pipes are integral components that direct exhaust gases away from the engine. Loosen and detach them carefully to prepare for the complete removal of the old manifold.
Detaching Sensors and Wires
Additionally, take note of sensors and wires connected to the existing Engine Exhaust Manifold. These components play crucial roles in monitoring and regulating various engine functions. Safely detach them from the manifold to avoid any damage during its removal process.
Unbolting the Manifold
Loosening Bolts in Sequence
When unbolting the old Engine Exhaust Manifold, follow a specific sequence to ensure a systematic approach. Loosen bolts securing the manifold gradually and in an organized manner. This methodical process helps prevent any sudden movements or potential damage during removal.
Carefully Removing the Manifold
Finally, with all bolts loosened, carefully remove the old Engine Exhaust Manifold from its position. Pay close attention to any remaining connections or attachments as you lift out the manifold. Ensure a steady and controlled extraction to prevent any accidental damage to surrounding components.
Installation of the New Exhaust Manifold
Preparing the New Manifold
Inspecting for Defects
- Examine the new exhaust manifold meticulously to ensure it is free from any defects or imperfections that could impact its performance.
- Look for any signs of damage, such as cracks or irregularities, that may compromise the manifold’s functionality.
- Verify that all surfaces are smooth and without blemishes to guarantee a proper fit and optimal operation.
Applying Anti-seize Compound
- Apply an adequate amount of anti-seize compound to the bolt threads before installing the new exhaust manifold.
- Coat the threads evenly with the compound to facilitate future disassembly and prevent corrosion or seizing.
- Ensure thorough coverage of all threaded areas to ease maintenance and potential future replacements.
Positioning the Manifold
Aligning with Exhaust Ports
- Align the new exhaust manifold carefully with the exhaust ports on the engine block for a precise fit.
- Match each port accurately to avoid misalignment issues that could hinder performance.
- Double-check alignment before proceeding with further installation steps.
Hand-tightening Bolts
- Begin by hand-tightening all bolts securing the new exhaust manifold in place.
- Gradually tighten each bolt in a cross-pattern to ensure uniform pressure distribution.
- Avoid over-tightening to prevent damage and allow for adjustments during final tightening.
Securing the Manifold
Tightening Bolts to Specified Torque
- Use a torque wrench to tighten all bolts on the exhaust manifold according to manufacturer specifications.
- Follow recommended torque settings meticulously to achieve proper clamping force without causing damage.
- Check each bolt multiple times to confirm they are securely fastened at the specified torque level.
Reattaching Sensors and Wires
- Reconnect sensors and wires previously detached from the old exhaust manifold onto their respective positions on the new one.
- Ensure proper connections are made securely without any loose ends or exposed wiring.
- Test connections post-installation to validate functionality before completing the process.
Reconnecting Exhaust Pipes
Ensuring Proper Fit
- Align each exhaust pipe meticulously with the corresponding openings on the new exhaust manifold to guarantee a precise fit.
- Verify that the pipes are correctly positioned to prevent any misalignment issues that could impact the overall performance of the exhaust system.
- Double-check the alignment of each pipe before proceeding with further installation steps to ensure optimal functionality.
Tightening Clamps and Bolts
- Securely fasten all clamps and bolts that connect the exhaust pipes to the new manifold using appropriate tools for a tight seal.
- Apply consistent pressure when tightening the clamps and bolts to prevent leaks and ensure a secure connection between components.
- Check each clamp and bolt multiple times to confirm they are tightened adequately, maintaining the integrity of the exhaust system.
Troubleshooting and Tips
Common Issues
Leaks at the Gasket
- Improper installation of the exhaust manifold can lead to leaks at the gasket interface.
- These leaks can result in decreased engine performance and potential damage to surrounding components.
- Addressing gasket leaks promptly is crucial to prevent further complications in the exhaust system.
Misalignment Problems
- Misalignment issues may arise during the installation of the new exhaust manifold.
- Misaligned components can disrupt exhaust flow and cause inefficiencies in engine operation.
- Identifying and rectifying misalignment problems is essential for optimal performance of the exhaust system.
Solutions and Tips
Rechecking Bolt Tightness
- After installing the new exhaust manifold, it is recommended to recheck the tightness of all bolts.
- Ensuring that bolts are securely fastened prevents potential leaks and maintains structural integrity.
- Regularly inspecting bolt tightness helps avoid issues that could compromise the functionality of the exhaust system.
Using High-quality Gaskets
- Opting for high-quality gaskets during installation can significantly impact performance.
- Premium gaskets provide a secure seal, reducing the risk of leaks and ensuring efficient engine operation.
- Investing in quality gaskets enhances longevity and reliability, contributing to a well-maintained exhaust system.
- Reflect on the meticulous installation process, ensuring each step is executed with precision.
- Highlight the advantages of proper installation and regular maintenance for sustained engine performance.
- Werkwell’s products, like the Harmonic Balancer, are tailored to enhance MGB exhaust systems effectively.
- Encourage enthusiasts to embark on the installation journey confidently, embracing the rewarding experience.
Post time: Jun-19-2024