


Intake Manifold: A vital component in an engine, the how to remove the intake manifold plays a crucial role in distributing air to the cylinders and ensuring optimal combustion. High-precision shell core technology enhances performance and efficiency, contributing to smoother airflow and improved engine function. This component is essential for V-engined cars, providing extended runner length within limited space. By allowing the engine to breathe effectively, the aftermarket intake manifold guarantees uniform air distribution to all cylinders for enhanced performance.
Intake Manifold Removal Process

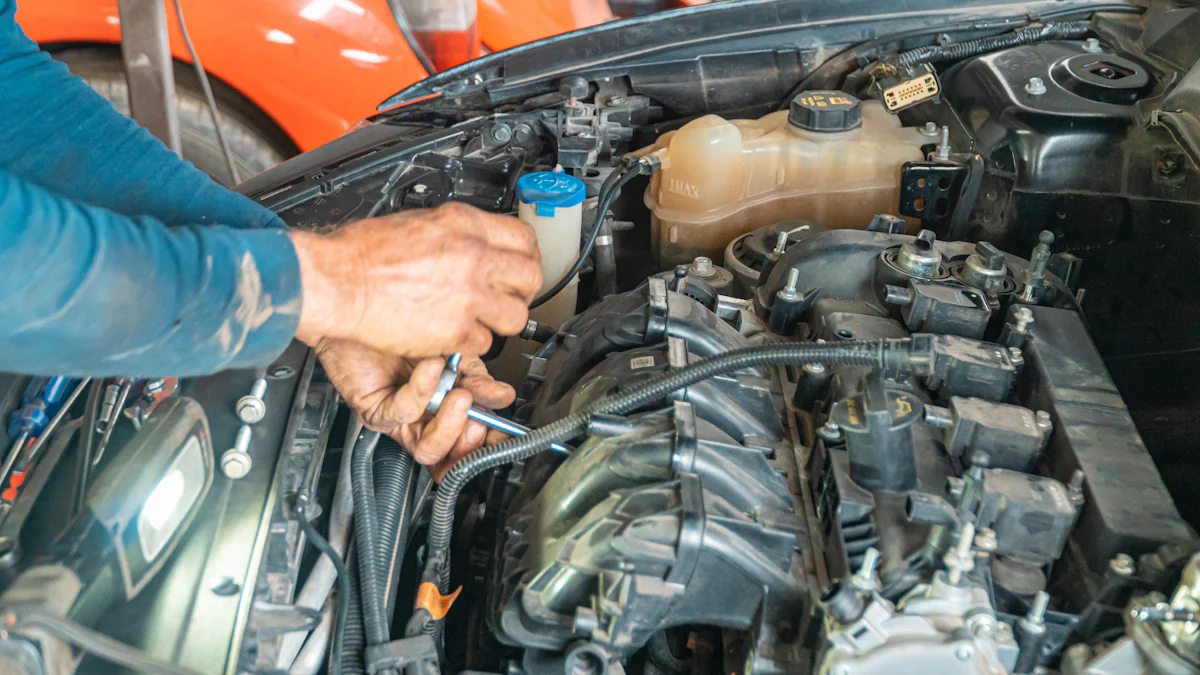
When preparing to remove the intake manifold, it is crucial to ensure all safety precautions are in place. This includes wearing appropriate safety gear and allowing the engine to cool down adequately. Proper engine cooling prevents any accidents or injuries during the removal process.
To begin, the first step involves removing the air filter and container. Start by carefully taking out the air filter, ensuring not to damage it in the process. Then proceed to detach the container, making sure to keep track of all removed components for reassembly later.
Tools and Parts Needed
Required Tools
- A 3/8th socket set
- 8, 10, 12, 14mm sockets
- 3/8th ratchet
- Extensions
- Assorted pliers
Necessary Parts
- Hose removal pliers
- Fuel line disconnects
- TGV to engine gaskets
- Coolant
By following these steps diligently and using the specified tools and parts, you can effectively complete the intake manifold removal process with ease.
Step 1: Disconnect the Fuel Line
To effectively disconnect the fuel line during the intake manifold removal process, it is essential to locate the fuel line accurately. The fuel line is typically situated near the intake manifold and can be identified by its connection to the engine. Once you have located the fuel line, proceed with caution to avoid any spills or leaks.
Next, initiate the disconnecting process by carefully loosening the fittings that secure the fuel line in place. Use appropriate tools such as hose removal pliers to disconnect the fuel line smoothly. Ensure that you have a container ready to catch any excess fuel that may drain out during this step.
Remember to handle the fuel line delicately and follow safety protocols to prevent any accidents or injuries. By disconnecting the fuel line correctly, you pave the way for seamless progression through the intake manifold removal procedure.
Locate the Fuel Line
- Identify its position near the intake manifold
- Check for connections leading to the engine
Disconnecting Process
- Loosen fittings securely holding the fuel line
- Utilize hose removal pliers for a smooth disconnection
Step 2: Loosen the Nuts
Nuts Location
When proceeding with the intake manifold removal, locate the nuts that secure the carburetor and intake manifold together. These nuts are typically positioned at specific points along the assembly, requiring attention to detail for successful removal.
Loosening Process
To effectively loosen the nuts during this step, utilize a 10 mm open-end wrench or a 10 mm socket/ratchet. Carefully position the tool over each nut and apply gradual pressure in a counterclockwise direction to loosen them. Ensure consistent force is applied to prevent damage to the surrounding components.
Once all nuts are sufficiently loosened, remove them carefully from their respective positions. Keep track of each nut to facilitate reassembly later in the process. By following this methodical approach, you can efficiently progress through the intake manifold removal procedure with precision and ease.
Integrating these tools seamlessly into your workflow enhances efficiency and accuracy during the removal process. Remember to handle each nut delicately and store them securely for safekeeping until reinstallation is required.
Step 3: Remove the Intake Manifold
Manifold Removal Process
To execute the manifold removal process effectively, begin by using a 10 mm open-end wrench or a 10 mm socket/ratchet to loosen and remove the nuts securing the intake manifold. Carefully unscrew each nut in a counterclockwise direction, ensuring consistent pressure to prevent any damage. Once all nuts are removed, gently detach the intake manifold from its housing.
After successfully removing the intake manifold, proceed with cleaning the intake ports to maintain optimal engine performance. Utilize a vacuum to remove any debris or dirt accumulated within the ports. Thoroughly inspect and clean each port to ensure proper airflow and combustion efficiency.
Cleaning the Intake Ports
- Use a vacuum to eliminate debris
- Inspect each port meticulously
- Ensure thorough cleaning for optimal performance
By following these steps diligently, you can seamlessly complete the intake manifold removal process and maintain your engine’s functionality at its best.
MerCruiser Intake Manifold Removal
Specific Tools and Parts
MerCruiser Tools
When embarking on the MerCruiser intake manifold removal, it is essential to have the right tools at your disposal. The MerCruiser tools required for this task include a 3/8th socket set, various sockets ranging from 8mm to 14mm, a 3/8th ratchet, extensions for added reach, and assorted pliers. These tools are crucial for efficiently dismantling the intake manifold and ensuring a smooth removal process.
MerCruiser Parts
In addition to the tools, specific parts are necessary for the MerCruiser intake manifold removal procedure. These parts include hose removal pliers for disconnecting hoses securely, fuel line disconnects to safely detach the fuel line, TGV to engine gaskets for resealing components, and coolant to maintain optimal engine temperature throughout the process. Having these parts readily available will streamline the removal process and contribute to a successful outcome.
Step 1: Preparation
Safety Measures
Prioritizing safety is paramount when preparing for the MerCruiser intake manifold removal. Ensure that all safety measures are in place before commencing work. This includes wearing appropriate protective gear such as gloves and goggles to prevent injuries. Additionally, make sure the engine is completely cooled down to avoid any accidents during the removal process.
Cooling the Engine
Properly cooling the engine is crucial before initiating the MerCruiser intake manifold removal. Allowing sufficient time for the engine to cool down reduces the risk of burns or other mishaps while handling components. By cooling the engine adequately, you create a safe working environment that facilitates a smooth and efficient removal process.
Step 2: Disconnect the Fuel Line
When approaching the disconnecting process of the fuel line, precision and caution are paramount. Identifying the fuel line location near the intake manifold is crucial for a seamless removal process. The connection leading to the engine serves as a clear indicator of its position. Utilizing specialized tools like Fuel line disconnect tools ensures a secure and efficient disconnection without any spills or leaks.
Initiating the disconnecting process demands meticulous attention to detail. Loosening the fittings securely holding the fuel line in place requires finesse and expertise. With Hose remover pliers Fuel, delicately detach the fuel line to avoid any damage or mishaps during this critical step.
By following these steps diligently, you can navigate through the fuel line disconnection with confidence and precision, setting a solid foundation for a successful intake manifold removal procedure.
Step 3: Loosen the Nuts
Nuts Location
To proceed with the removal process smoothly, identify the specific locations of the nuts that secure the carburetor and intake manifold together. These nuts play a crucial role in maintaining the structural integrity of the assembly.
Loosening Process
When loosening the nuts, ensure precision and care to avoid any damage to surrounding components. Utilize a 10 mm open-end wrench or a 10 mm socket/ratchet for this task. Apply gradual pressure in a counterclockwise direction to loosen each nut effectively.
By following these steps meticulously, you can prepare the assembly for seamless disassembly without compromising its functionality or stability.
Step 4: Mark and Remove the Gasket
Marking the Gasket
Before removing the gasket, mark its position meticulously to ensure proper alignment during reinstallation. This step is essential to maintain consistency and prevent any misalignment issues.
Removing the Gasket
Carefully remove the gasket by gently peeling it off from its placement. Take your time to avoid tearing or damaging the gasket, as it serves as a critical seal between components.
By marking and removing the gasket methodically, you pave the way for a successful dismantling process while preserving component integrity.
Step 5: Remove the Intake Manifold
Manifold Removal Process
When tackling the removal of the intake manifold, precision and care are paramount to ensure a smooth process. Begin by using a 10 mm open-end wrench or a 10 mm socket/ratchet to loosen and remove the nuts securing the intake manifold. Slowly unscrew each nut in a counterclockwise direction, maintaining consistent pressure to prevent any damage. Once all nuts are detached, gently separate the intake manifold from its housing.
After successfully removing the intake manifold, it is crucial to focus on cleaning the intake ports for optimal engine performance. Utilize a vacuum to eliminate any debris or dirt accumulated within the ports. Thoroughly inspect each port to guarantee proper airflow and combustion efficiency.
Cleaning the Intake Ports
- Use a vacuum to remove debris
- Inspect each port meticulously
- Ensure thorough cleaning for optimal performance
By following these steps diligently, you can seamlessly complete the intake manifold removal process and maintain your engine’s functionality at its best.
Manifold Removal and Replacement
Tools and Parts Needed
Required Tools
- 3/8th socket set
- 8, 10, 12, 14mm sockets
- 3/8th ratchet
- Extensions for added reach
- Assorted pliers for various tasks
Necessary Parts
- Hose removal pliers for secure hose disconnection
- Fuel line disconnects to safely detach the fuel line
- TGV to engine gaskets for resealing components effectively
- Coolant to maintain optimal engine temperature during the process
Step 1: Preparation
Safety Precautions
Prioritize safety by wearing appropriate protective gear such as gloves and goggles. Ensure a safe working environment by following all recommended safety measures.
Engine Cooling
Allow the engine sufficient time to cool down completely before starting the manifold removal process. This step is crucial in preventing any accidents or injuries during the procedure.
Step 2: Remove the Air Filter and Container
Air Filter Removal
Carefully remove the air filter to access the intake manifold easily. Handle the air filter with care to prevent damage.
Container Removal
Detach the container while keeping track of all removed components for reassembly later on. Organizing parts ensures a smooth replacement process without missing any essential elements.
Step 3: Disconnect the Fuel Line
Locate the Fuel Line
To successfully proceed with the intake manifold removal process, accurately locate the fuel line positioned near the intake manifold. The fuel line’s proximity to the engine makes it easily identifiable for a seamless disconnection.
Disconnecting Process
Initiate the disconnecting process by ensuring you have identified the fuel line correctly. Utilize specialized tools like Fuel line disconnects to securely detach the fuel line without causing any leaks or spills. Carefully loosen and remove any fittings holding the fuel line in place to facilitate a smooth disconnection.
By following these steps diligently, you can efficiently navigate through disconnecting the fuel line, setting a solid foundation for a successful intake manifold removal procedure.
Step 4: Loosen the Nuts
Nuts Location
When preparing to loosen the nuts, identify their locations meticulously. The nuts securing the carburetor and intake manifold are strategically positioned along the assembly. Locate each nut precisely to ensure a systematic approach to the removal process.
Loosening Process
To effectively loosen the nuts, utilize a 10 mm open-end wrench or a 10 mm socket/ratchet. Apply gradual pressure in a counterclockwise direction to release each nut securely. By following this methodical approach, you can systematically loosen all nuts without causing any damage to surrounding components.
Step 5: Mark and Remove the Gasket
Marking the Gasket
Before proceeding with removing the gasket, take time to mark its position accurately. Marking ensures proper alignment during reinstallation, maintaining component integrity throughout the process.
Removing the Gasket
Carefully peel off the gasket from its placement, ensuring gentle handling to prevent tearing or damage. Methodically removing the gasket guarantees a smooth dismantling process while preserving its structural integrity.
Step 6: Remove the Bracket and Fasteners
Bracket Removal
Prioritize removing the bracket first before tackling fasteners underneath and on top of the intake manifold. Start by detaching the bracket carefully to facilitate subsequent steps seamlessly.
Fasteners Removal
After removing the bracket, proceed with removing fasteners located underneath and on top of the intake manifold. Ensure meticulous attention to detail when unscrewing each fastener for successful removal without compromising other components’ stability.
Step 7: Remove the Intake Manifold
Manifold Removal Process
- Detach Nuts: Begin by using a 10 mm open-end wrench or a 10 mm socket/ratchet to loosen and remove the nuts securing the intake manifold. Unscrew each nut in a counterclockwise direction with consistent pressure to prevent damage.
- Gently Separate: Once all nuts are loosened, gently detach the intake manifold from its housing. Take your time to ensure a smooth removal process without causing any harm to surrounding components.
Cleaning the Intake Ports
- Eliminate Debris: Utilize a vacuum to clean the intake ports thoroughly. Remove any dirt or debris accumulated within the ports for optimal engine performance.
- Meticulous Inspection: Inspect each port meticulously to guarantee proper airflow and combustion efficiency. Ensure that all ports are clean and free of any obstructions.
Step 8: Final Steps
Inspecting the Area
- Thorough Examination: Conduct a detailed inspection of the area after removing the intake manifold. Check for any remaining debris or signs of wear that may require attention.
- Ensure Cleanliness: Verify that the area is clean and free from any leftover components or dirt that could affect engine performance.
Replacing with New Manifold
- Secure Installation: When replacing with a new manifold, ensure it is securely positioned in place. Follow proper guidelines for installation to maintain engine functionality.
- Tighten Fasteners: Securely fasten all nuts and bolts to prevent any loose connections that could lead to issues in the future.
To conclude, the intake manifold removal process is a crucial maintenance task that ensures optimal engine performance. By following the easy steps outlined above, you can effectively remove the intake manifold and have your car running smoothly again. Remember to clean the intake ports thoroughly to maintain efficiency. For a successful outcome, inspect the area meticulously and replace with a new manifold securely. Always prioritize safety measures and consult your vehicle’s manual for specific instructions. With these tips in mind, you can confidently tackle this essential procedure.
Post time: Jun-29-2024