


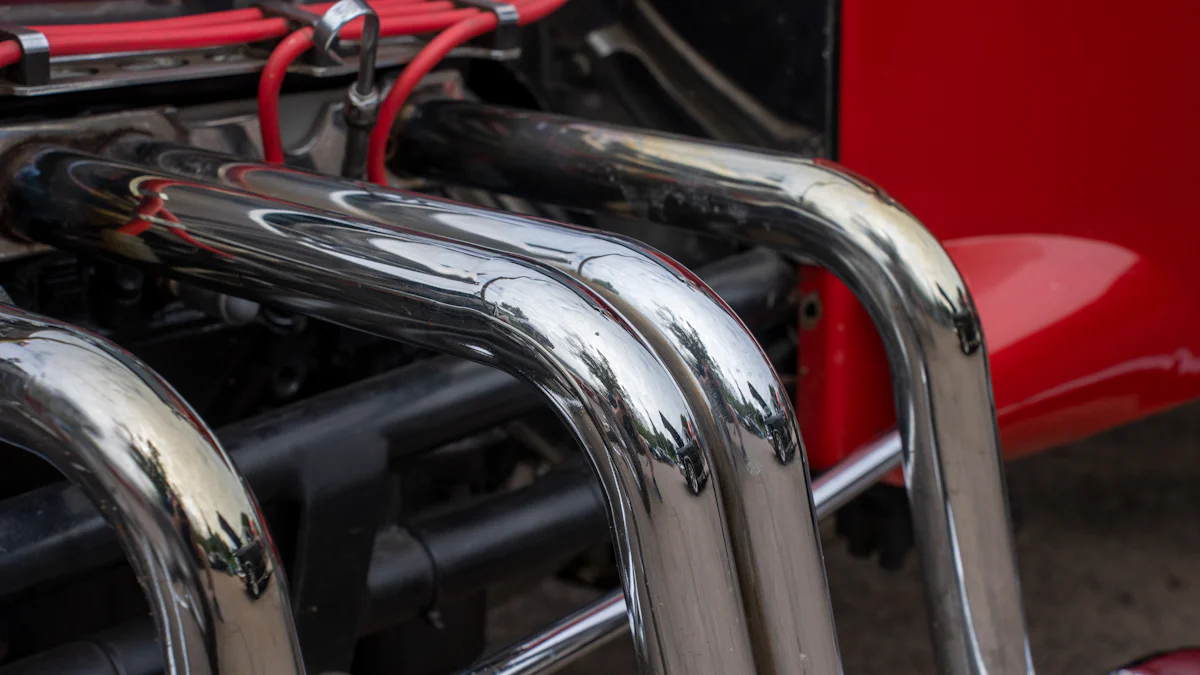
When it comes to vehicle maintenance, addressing a hole in the exhaust manifold is crucial for optimal performance. Modern performance exhaust manifol, now equipped with sensors for temperature, pressure, and oxygen levels, face various complexities. Common issues like cracks between cylinder branches can lead to detrimental effects on fuel delivery. Repairing these maladies promptly can prevent further damage and ensure a smooth driving experience. In this blog, we will delve into the significance of repairing exhaust manifolds, provide an overview of the repair methods available, and highlight the essential tools and materials needed for the task.
Understanding Exhaust Manifolds
Using Metal Repair Paste
Materials needed
- Metal Repair Paste
- Clean Cloth
- Sandpaper
- Protective Gloves
Step-by-step guide
- Prepare the Surface: Start by cleaning the area around the hole with a clean cloth to remove any debris or dirt.
- Sand the Area: Use sandpaper to roughen up the surface around the hole for better adhesion of the metal repair paste.
- Apply the Paste: Take a small amount of metal repair paste and apply it over the hole, ensuring full coverage.
- Smooth Out: Use a tool to smooth out the paste evenly over the damaged area, filling in any gaps or cracks.
- Let It Cure: Allow the paste to cure as per the manufacturer’s instructions before proceeding to finish.
Curing and finishing
- After allowing sufficient time for curing, inspect the repaired area for any imperfections or unevenness.
- Once fully cured, sand down any excess paste gently to achieve a smooth finish that blends seamlessly with the manifold surface.
Using Epoxy Adhesives
Materials needed
- Epoxy Adhesive
- Mixing Container
- Stirring Stick
- Sandpaper
Step-by-step guide
- Mixing Epoxy: Combine equal parts of epoxy adhesive in a mixing container and stir thoroughly until well blended.
- Prepare Surface: Clean and dry the area around the hole before applying epoxy for better adhesion.
- Apply Epoxy: Use a suitable applicator to spread an even layer of epoxy over and around the damaged section.
- Allow Bonding: Let the epoxy bond with the manifold surface according to curing time recommendations.
- Final Inspection: Check for proper adhesion and smoothness after curing before moving on to finishing steps.
Curing and finishing
- Once fully cured, sand down any rough edges or excess epoxy carefully to achieve a seamless integration with the exhaust manifold.
Using Exhaust Repair Tape
Materials needed
- Exhaust Repair Tape
- Scissors (for cutting tape)
Step-by-step guide
- Clean Surface: Ensure that the area around the hole is clean and free from grease or debris before applying repair tape.
- Measure and Cut Tape: Cut an appropriate length of exhaust repair tape based on the size of the hole you are repairing.
- Wrap Around Hole: Carefully wrap the tape around the damaged section, ensuring tight coverage without overlaps.
- Secure Placement: Press firmly on both ends of the tape to secure it in place and activate its bonding properties.
Curing and finishing
- The exhaust repair tape will cure naturally once applied correctly, forming a strong seal over the hole that can withstand high temperatures and pressure.
By understanding these different methods of repairing holes in exhaust manifolds using metal repair paste, epoxy adhesives, and exhaust repair tape, beginners can tackle common issues effectively while prolonging their vehicle’s lifespan through timely maintenance practices.
Brazing for Larger Holes
When faced with larger holes in the exhaust manifold, brazing emerges as a reliable solution to restore functionality and ensure optimal performance. This method involves using a filler metal that melts at a higher temperature than soldering but below the melting point of the base metals, creating a strong bond. By following the correct procedure and utilizing essential materials, even beginners can successfully tackle significant damage in their exhaust system.
Materials needed
- Brazing Rods: Select appropriate brazing rods compatible with the materials of your exhaust manifold for effective repair.
- Acetylene Torch: Utilize an acetylene torch to generate the high heat required for brazing operations.
- Flux: Apply flux to clean and prepare the surfaces for brazing, ensuring proper adhesion of the filler metal.
- Safety Gear: Prioritize safety with protective gear such as gloves, goggles, and flame-resistant clothing to prevent accidents.
Step-by-step guide
- Prepare the Surface: Begin by cleaning the area around the hole thoroughly to remove any dirt, rust, or debris that could interfere with the brazing process.
- Apply Flux: Coat both the exhaust manifold surface and the brazing rod with flux to facilitate bonding and prevent oxidation during heating.
- Heat the Area: Use an acetylene torch to heat the damaged section evenly until it reaches the optimal temperature for brazing.
- Introduce Brazing Rod: Once heated adequately, introduce the brazing rod to melt onto the hole, filling it completely and forming a strong seal.
- Cool Down: Allow sufficient time for the repaired area to cool down naturally before proceeding with post-heating steps.
Preheating and post-heating
- Before initiating brazing, preheat your exhaust manifold uniformly to reduce thermal shock during repair.
- Post-heating is crucial after completing brazing to ensure proper cooling of both the repaired area and surrounding components.
- Monitor temperatures carefully during preheating and post-heating stages to prevent overheating or damage to adjacent parts.
By mastering the art of brazing for larger holes in exhaust manifolds through meticulous preparation, precise execution, and diligent post-repair care, beginners can enhance their automotive repair skills while prolonging their vehicle’s lifespan effectively.
Tips and Precautions
Safety Measures
When working on repairing holes in exhaust manifolds, safety measures should be a top priority to prevent accidents and ensure a smooth repair process. Here are essential safety precautions to follow:
- Wear Protective Gear: Prioritize your safety by wearing appropriate protective gear such as gloves, goggles, and flame-resistant clothing to shield yourself from potential hazards.
- Work in a Well-Ventilated Area: Ensure proper ventilation in the workspace to avoid inhaling harmful fumes or gases released during the repair process.
- Use Tools Safely: Handle tools with care and follow manufacturer instructions for safe usage to prevent injuries or accidents.
- Avoid Contact with Hot Surfaces: Be cautious of hot surfaces, especially when dealing with heated components, to prevent burns or skin damage.
- Keep Fire Extinguisher Nearby: Have a fire extinguisher within reach in case of emergencies involving flammable materials catching fire.
- Stay Alert and Focused: Maintain focus on the task at hand and avoid distractions to work efficiently and minimize the risk of errors.
- Dispose of Waste Properly: Dispose of waste materials responsibly, following local regulations for hazardous waste disposal to protect the environment.
By adhering to these safety measures diligently, beginners can ensure a secure working environment while repairing exhaust manifold holes effectively.
Ensuring a Long-lasting Repair
To guarantee a long-lasting repair for exhaust manifold holes, it is crucial to consider certain factors that contribute to the durability of the fix. Here are some tips to help you achieve a repair that stands the test of time:
- Proper Surface Preparation: Thoroughly clean and prepare the surface around the hole before applying any repair method to ensure optimal adhesion and longevity of the fix.
- Select Quality Materials: Use high-quality metal repair paste, epoxy adhesives, or brazing rods that are compatible with your exhaust manifold material for a durable repair solution.
- Follow Manufacturer Guidelines: Adhere to the manufacturer’s instructions for curing times, application techniques, and finishing processes to maximize the effectiveness of the chosen repair method.
- Inspect Regularly: Periodically inspect the repaired area for any signs of wear, corrosion, or damage that may compromise the integrity of the fix over time.
- Address Issues Promptly: If you notice any new cracks or holes developing in the exhaust manifold, address them promptly to prevent further damage and maintain optimal performance.
- Monitor Performance: Keep an eye on your vehicle’s performance post-repair to ensure that there are no recurring issues related to exhaust leaks or manifold damage.
- Consider Professional Inspection: If you have concerns about the effectiveness of your DIY repair or encounter persistent problems, seek professional help from experienced mechanics for expert assessment and assistance.
By following these tips diligently and prioritizing quality in every step of the repair process, beginners can achieve repairs that withstand wear and tear over time effectively.
When to Seek Professional Help
While DIY repairs can be rewarding and cost-effective, there are instances where seeking professional help becomes necessary for complex issues or challenging repairs beyond your expertise. Here are scenarios where consulting a professional mechanic is advisable:
- Extensive Damage: If your exhaust manifold has extensive damage such as multiple large holes or severe cracks that require specialized equipment or expertise beyond DIY capabilities.
- Persistent Leaks: In cases where you have attempted multiple repairs but continue experiencing leaks or performance issues related to your exhaust system despite your efforts.
- Unfamiliar Repair Methods: When dealing with unfamiliar repair methods like brazing for larger holes that require specific skills or knowledge you may not possess.
- Safety Concerns: If you encounter safety concerns during the repair process such as unexpected complications, hazardous materials exposure, or risks associated with handling hot components.
- Manufacturer Recommendations: Following manufacturer recommendations for repairs involving warranty coverage or specific procedures best handled by authorized service centers.
- Complex Systems: For vehicles with complex exhaust systems incorporating advanced technologies like catalytic converters or integrated sensors requiring specialized diagnostics.
7 .Limited Experience: If you lack experience in automotive repairs overall or feel uncertain about tackling intricate issues related to exhaust manifolds without proper guidance.
In such situations where expertise, safety considerations, complexity of repairs exceed personal capabilities; seeking professional assistance ensures comprehensive solutions tailored towards efficient restoration of your vehicle’s exhaust system functionality.
In conclusion, beginners can now confidently tackle exhaust manifold repairs with the newfound knowledge of using metal repair paste, epoxy adhesives, exhaust repair tape, and brazing techniques. Regular maintenance is key to ensuring optimal vehicle performance and longevity. By following this comprehensive guide, individuals can address issues promptly and effectively. For high-quality automotive products and services, Werkwell offers a range of solutions like the Harmonic Balancer for various car models. Share your repair experiences on Social Media Facebook to engage with a community of automotive enthusiasts.
Post time: Jun-12-2024