


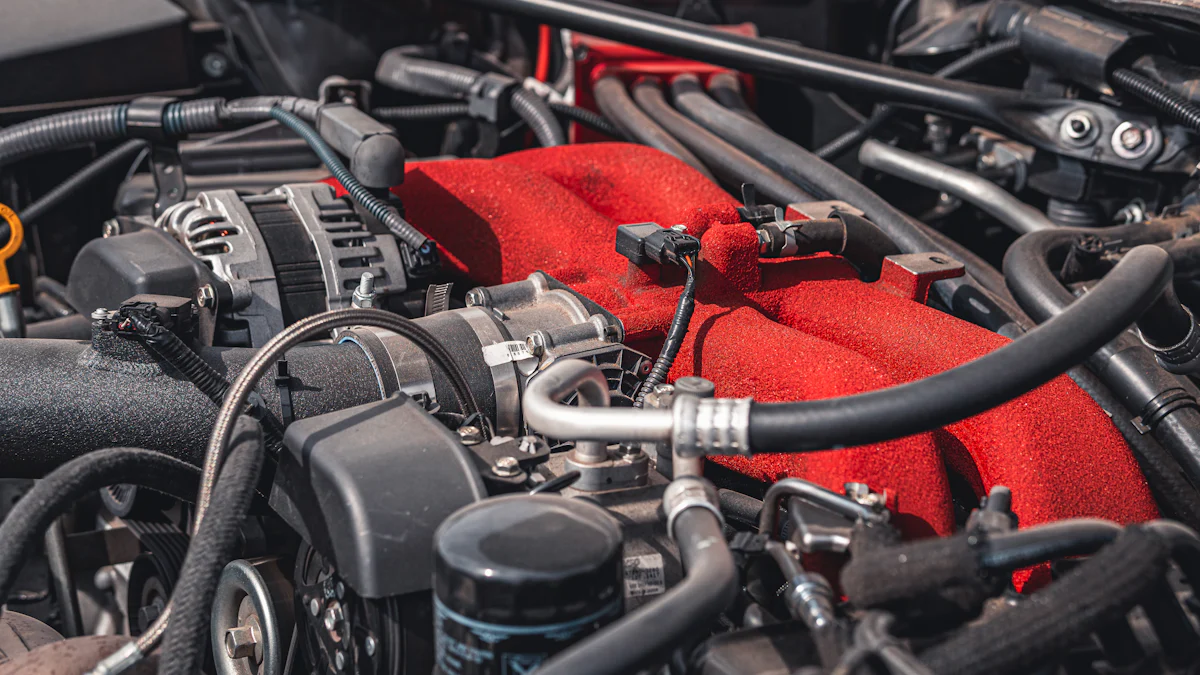
Upgrading the D16Z6 intake manifold offers significant benefits for Honda enthusiasts. Enhanced airflow and increased horsepower result from this modification. The upgrade process involves several steps, including removing the old engine intake manifolds and installing the new one. Performance improvements are crucial for achieving optimal engine efficiency. Improved throttle response and fuel economy make this upgrade a valuable investment.
Preparation
Tools and Materials
Required tools
Upgrading the D16Z6 intake manifold requires specific tools. A 12mm wrench, 10mm and 12mm sockets (both deep and regular), and drive ratchets in 1/4″, 3/8″, and 1/2″ sizes are essential. Screwdrivers, both Phillips and flathead, will also be necessary. A drill with various bits is crucial for certain tasks. Wire strippers are needed for electrical connections.
Necessary materials
Gathering the right materials ensures a smooth upgrade process. The SA Port and Polish Kit includes grits ranging from 40 to 120, along with a flap-style polisher and a brillo pad-type ball polisher. These items help achieve a polished finish on the intake manifold. Additionally, the 1320 Performance Extended Exhaust Stud Intake Manifold Kit provides extended studs that are 10mm longer than stock ones, addressing issues with stock studs being too short.
Safety Precautions
Handling the intake manifold
Handling an intake manifold requires care to avoid damage or injury. Always wear gloves to protect hands from sharp edges or hot surfaces. Use proper lifting techniques when moving heavy components to prevent strain or injury.
Ensuring a safe workspace
A safe workspace is crucial for any automotive upgrade project. Ensure adequate lighting in the work area to see all components clearly. Keep tools organized to prevent accidents caused by tripping over misplaced items. Ventilate the workspace well if using chemicals or performing tasks that generate fumes.
Initial Steps
Disconnecting the battery
Disconnecting the battery is a vital first step in any engine-related task. This prevents electrical shorts or accidental sparks during the upgrade process. Locate the negative terminal on the battery and use a wrench to disconnect it safely.
Removing existing components
Removing existing components clears space for installing the new intake manifold. Start by detaching fuel lines carefully to avoid spills or leaks. Remove support brackets holding the old manifold in place using appropriate tools like wrenches and sockets.
Following these preparation steps sets up a successful D16Z6 intake manifold upgrade project, ensuring safety and efficiency throughout each stage of installation.
Installation
Removing the Old Intake Manifold
Detaching fuel lines
Detaching fuel lines requires precision and care. Begin by locating the fuel lines connected to the D16Z6 intake manifold. Use a wrench to loosen the fittings. Ensure that no fuel spills during this process. Place a container beneath the connection points to catch any residual fuel. This step prevents potential hazards and keeps the workspace clean.
Removing support brackets
Removing support brackets involves using appropriate tools. Identify all brackets securing the old manifold in place. Use a combination of wrenches and sockets to remove these brackets systematically. Keep track of each bracket and bolt removed for reassembly later. Organizing parts ensures a smooth transition when installing the new manifold.
Installing the New D16Z6 Intake Manifold
Positioning the new manifold
Positioning the new D16Z6 intake manifold correctly is crucial for optimal performance. Align the new manifold with the engine ports carefully. Ensure that all gasket surfaces are clean and free from debris before positioning. A proper fitment guarantees an airtight seal, which is essential for efficient airflow.
Securing the manifold
Securing the manifold involves tightening bolts in a specific sequence. Start by hand-tightening each bolt to ensure alignment remains correct. Use a torque wrench to tighten bolts according to manufacturer specifications. This step prevents over-tightening or under-tightening, both of which can cause issues later on.
Connecting Additional Parts
Installing the block off plate
Installing a block off plate addresses compatibility issues between different models like D16Y7 and D16Z6 engines. The block off plate covers unused ports on the new D16Z6 intake manifold effectively, preventing air leaks and ensuring proper functionality of other components.
- Position block off plate over unused port.
- Secure with provided screws or bolts.
- Ensure tight fitment without gaps.
This simple yet vital step ensures that your upgraded system operates without hitches.
Connecting the Z6 fuel rail
Connecting a Z6 fuel rail enhances fuel delivery efficiency in your upgraded setup:
- Align Z6 fuel rail with injector ports on new manifold.
- Secure using mounting hardware included with rail.
- Double-check connections for any signs of leakage after installation.
A well-connected Z6 fuel rail optimizes performance by delivering consistent fuel flow needed for enhanced horsepower gains from your upgrade project.
Attaching the new PVC hose
Attaching a new PVC hose completes necessary connections required after upgrading your intake system:
1- Select appropriate length PVC hose compatible with both ends needing connection.
2- Attach one end securely onto designated port on D16Z6 intake manifold.
3- Connect opposite end onto corresponding engine component ensuring snug fitment without kinks or bends restricting airflow passage through hose itself.
Properly attached hoses contribute significantly towards maintaining overall integrity within entire upgraded setup while maximizing benefits derived from improved air/fuel mixture ratios achieved via enhanced airflow capabilities inherent within newly installed high-performance components such as those found within popular choices among Honda enthusiasts seeking increased power output levels through modifications involving their beloved vehicles’ engines’ respective systems alike!
Optimization
Porting and Polishing
Benefits of porting and polishing
Porting and polishing the engine intake manifolds can significantly enhance performance. This process increases airflow, which leads to better combustion efficiency. Improved airflow results in more horsepower and torque. The engine runs smoother, providing a noticeable improvement in throttle response. Enhanced fuel economy also becomes a benefit due to more efficient air-fuel mixture.
Porting removes material from the intake manifold’s internal passages. This action reduces restrictions that impede airflow. Polishing smooths the surfaces, further decreasing resistance. Together, these modifications optimize the flow of air into the engine cylinders.
Steps for porting and polishing
- Disassemble the Intake Manifold: Remove the intake manifold from the engine carefully.
- Clean Thoroughly: Use a degreaser to clean all surfaces of the manifold.
- Mark Areas for Porting: Identify areas where material needs removal using a marker.
- Remove Material: Use a die grinder with appropriate bits to remove excess material.
- Smooth Surfaces: Switch to finer grit tools for smoothing out rough edges.
- Polish Internals: Utilize flap-style polishers and brillo pad-type ball polishers for final polishing.
- Reassemble Manifold: Clean again before reassembling onto the engine.
Following these steps ensures optimal performance gains from porting and polishing your intake manifold.
Using Thermal Gaskets
Advantages of thermal gaskets
Thermal gaskets provide several advantages when upgrading your intake system. These gaskets reduce heat transfer between the engine block and intake manifold, keeping incoming air cooler. Cooler air is denser, leading to better combustion efficiency and increased power output.
Thermal gaskets also prevent heat soak during extended periods of high-performance driving or hot weather conditions. This prevention maintains consistent performance levels without loss due to overheating components.
Using thermal gaskets extends component life by reducing thermal stress on both the intake manifold and surrounding parts.
Installation process
- Prepare Surfaces: Ensure both mating surfaces (engine block and intake manifold) are clean and free from debris.
- Position Gasket: Place the thermal gasket onto the engine block’s mating surface accurately.
- Align Intake Manifold: Position the intake manifold over the gasket ensuring proper alignment with bolt holes.
4- Secure Bolts*: Hand-tighten bolts initially then use a torque wrench following manufacturer specifications for final tightening sequence.
Proper installation guarantees maximum benefits derived from using thermal gaskets within your upgraded setup while maintaining overall integrity throughout entire system alike!
Performance Testing
Initial tests
Initial tests after installing new components ensure everything functions correctly before extensive use:
1- Start Engine*: Listen closely for any unusual noises indicating potential issues such as vacuum leaks or loose connections within newly installed parts themselves alike!
2- Check Gauges*: Monitor vital signs like oil pressure temperature readings ensuring normal operating ranges maintained consistently throughout initial testing phase itself too!
3- Inspect Connections*: Visually inspect all connections verifying tightness absence leaks anywhere around newly upgraded areas themselves included here now!
These steps confirm successful installation allowing confidence moving forward towards achieving desired performance improvements sought through undertaking project itself originally planned beforehand already done so far now today here too!
Recapping the upgrade process highlights key steps. The preparation phase involves gathering tools and materials, ensuring safety, and disconnecting the battery. Installation includes removing the old intake manifold, positioning the new one, and connecting additional parts. Optimization covers porting and polishing, using thermal gaskets, and performance testing.
Performance benefits include enhanced airflow, increased horsepower, improved throttle response, and better fuel economy. Upgrading the D16Z6 intake manifold transforms engine efficiency.
“Upgrading to an aftermarket manifold with short runners boosts top-end power,” says a satisfied user.
Undertake this upgrade for noticeable improvements in your vehicle’s performance.
Post time: Jul-17-2024